



Dental Instrument Maintenance: A Practical Guide for Clinics
Executive Summary: Clean, well-maintained dental tools protect patients and staff from cross-contamination and help clinics stay compliant with health standards. Simple daily habits, correct sterilisation steps, and regular inspection extend instrument life and lower replacement costs. Small, consistent daily routines make a measurable difference in clinic safety, inspection readiness, patient confidence, and daily workflow across busy dental practices
In the quiet hours after the last patient leaves, the real drama unfolds: instruments either get the spa treatment they earned, or they plot their next clinical rebellion. Your dental instruments clock more hours than the clinic's coffee machine, and they complain far louder when ignored.
Rust spots, dull edges, and failed cycles are exactly that kind of complaint. Regular attention keeps small problems from turning costly. That is the job of a proper dental instrument maintenance guide, one that a dental team follows long after the last patient has gone home.
Why Dental Instrument Care Matters
Patient safety, legal compliance, and clinic budgets all rest on the same daily habits.
Patient Safety Comes First
Blood and saliva carry pathogens that spread quickly between patients if tools are not cleaned properly. A missed step in reprocessing can expose the next patient to serious infection risk. Clinics that build safety checks into every shift protect their patients without slowing down appointments.
Compliance With Health Standards
Australian dental practices must follow relevant infection prevention and control requirements, professional obligations, and applicable health standards. Guidance from Australian health authorities and the Dental Board of Australia supports safe cleaning, reprocessing, sterilisation, record keeping, and instrument handling. A consistent dental instrument maintenance routine for clinics helps support effective infection-control practices and keeps reprocessing procedures organised.
Cost Savings Over Time
Instruments rinsed, dried, and stored correctly last far longer than those left wet or scratched. Replacing corroded scalers and forceps adds up quickly. Good maintenance habits protect that investment year after year.
Steps in a Dental Instrument Maintenance Guide
Every clinic benefits from a clear, repeatable process built around a few core stages.
1. Pre-Cleaning Straight After Use
Clean instruments promptly after use to prevent blood and debris from drying on their surfaces. Dried residue is more difficult to remove and may hinder effective sterilisation. Use enzymatic detergents as directed.
2. Manual and Ultrasonic Cleaning
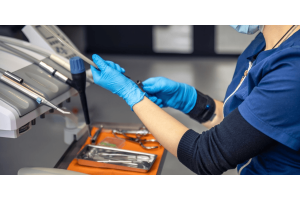
Manual scrubbing with a soft brush removes visible debris from hinges, grooves, and serrated edges. Ultrasonic cleaners use sound waves to help remove debris from difficult-to-reach areas. Automated cleaning equipment can improve cleaning effectiveness before sterilisation.
3. Drying and Visual Inspection
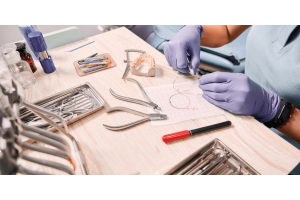
Wet instruments left in packaging can rust or grow bacteria before the next cycle begins. Staff should check each tool under good light for cracks, pitting, or dulled edges. Setting damaged instruments aside for repair keeps the whole dental instrument maintenance routine on track.
4. Correct Sterilisation Cycles
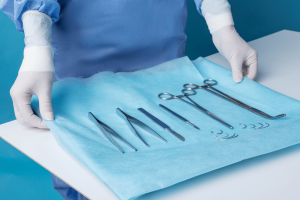
Autoclaves using steam under pressure remain the gold standard for tools that touch soft tissue or bone. Cycle time, temperature, and pressure must match the steriliser manufacturer's instructions for each load. Recording cycle data creates a paper trail that protects the clinic later.
Sterilisation Methods and Requirements
The table below outlines the appropriate sterilisation methods for each instrument category.
Instrument Category | Example Tools | Required Method |
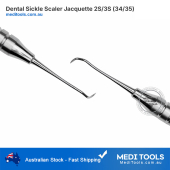
Critical | Scalers, forceps, surgical burs | Heat sterilisation according to manufacturer instructions |
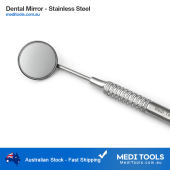
Semi-critical | Mirrors, impression trays | Heat sterilisation or high-level disinfection |
Non-critical | Blood pressure cuffs, light handles | Cleaning plus low or intermediate disinfection |
Handpieces | Low-speed and high-speed motors | Heat sterilisation between every patient |
Common Mistakes in Dental Instrument Cleaning
A handful of small oversights cause most of the sterilisation failures clinics report each year.
● Overloading the steriliser. Packing too many pouches can block steam from reaching every surface, leaving instruments partially sterilised. Staying within the steriliser's rated capacity keeps each load effective.
● Skipping biological indicators. Mechanical gauges and chemical strips show that a cycle ran, but biological indicators verify that spores were destroyed. Skipping them creates a gap in the clinic's safety record.
● Using damaged packaging. A torn or punctured pouch can let contaminants back in after processing, requiring the tool to go through the full cycle again. Check every seal before storage and use.
● Ignoring water quality. Hard or contaminated water can leave mineral spots and gradually pit stainless steel, shortening instrument life. Treated or distilled water helps protect the tools.
● Poor storage conditions. Pouches stored near sinks or in humid cabinets risk moisture damage and mould growth. A dry, labelled storage area helps protect sterilised instruments and supports proper stock rotation.
Frequently Asked Questions
1. How Do I Maintain Dental Instruments?
Rinse tools after use, clean them thoroughly, dry them fully, inspect for damage, and sterilise them according to the manufacturer's cycle before storing them in a dry, labelled area.
2. How Do I Sterilise Dental Instruments?
Clean and dry instruments first, then place them in an FDA-cleared autoclave using the cycle time, temperature, and pressure set by the steriliser manufacturer.
3. How Often Should Dental Instruments Be Sterilised?
Sterilise every critical and semi-critical instrument after each use, and check sterilisers with biological indicators at least weekly.
4. How Do I Inspect Dental Instruments?
Check each tool under bright light for rust spots, cracks, pitting, or dull edges, and set aside anything damaged for repair before the next cycle.
5. What Causes Dental Instruments To Rust?
Leftover moisture, poor quality water, prolonged contact with blood, and damaged protective coatings all speed up corrosion on stainless steel tools.
Conclusion
Dental instrument maintenance for clinics does not need to be complicated once a clear routine is in place. Rinsing promptly, cleaning thoroughly, sterilising correctly, and storing tools properly protects patients and extends the working life of every instrument. Consistency across the whole team turns these steps into a shared habit, not an extra task. A clinic that treats maintenance as part of patient care builds trust with every appointment.
A clinic is only as reliable as the tools on its tray. If you want to buy medical instruments made to survive every clean, MediTools Pty Ltd offers a dependable dental range. Choose us today for gear built around clinical reliability!
Disclaimer
The content provided here on the sterilization, cleaning, and reprocessing of surgical and medical instruments is strictly for informational and educational purposes only. This information is not a substitute for professional training, certification, or the manufacturer's official Instructions for Use (IFU). Sterilization is a critical, complex process that demands strict adherence to regulatory standards; improper technique can cause serious harm, including patient infection. All healthcare personnel must follow their facility's established protocols and the specific IFU for every instrument and piece of equipment. By using this blog, you agree that the author/owner holds no liability for any damages or consequences resulting from the application or misuse of this information.