



How to Maintain Nail Nippers for Long-Term Performance?
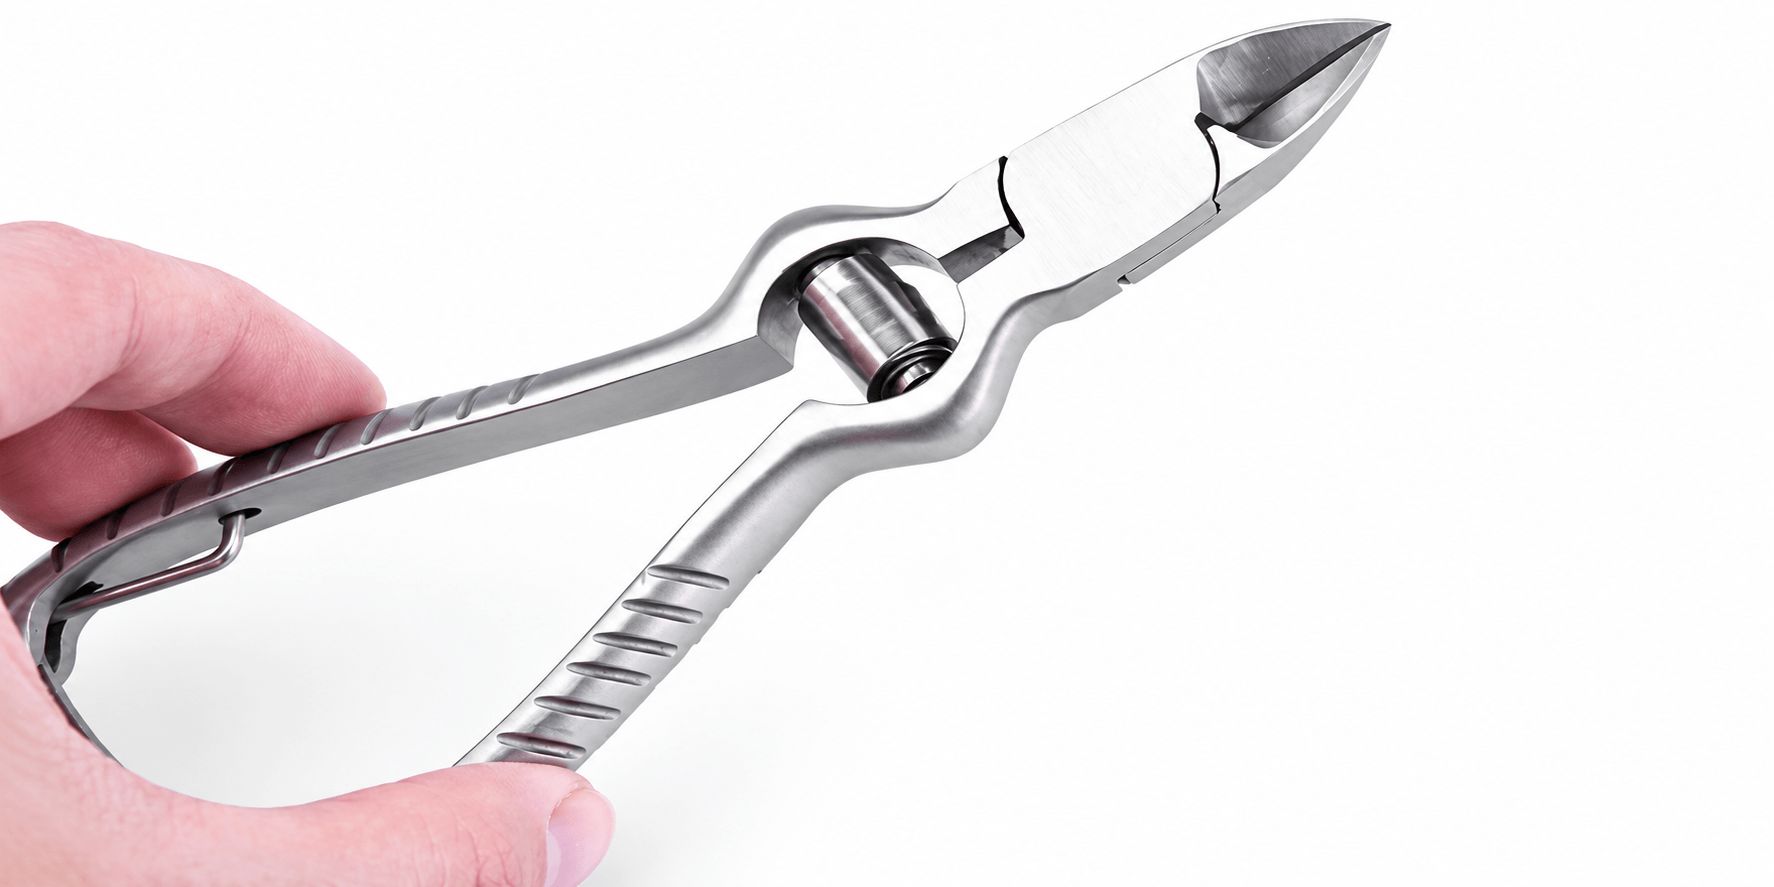
If you work in podiatry, nail care, or any hands-on health profession, your nail nippers are tools you depend on every single day. They handle tough, thick, and sometimes ingrown nails with precision. But even the best pair will not last long without proper care. The good news is that nail nipper maintenance does not involve costly equipment or complex procedures.
It just requires consistency and a basic understanding of what these tools need to stay in top shape. This nail nipper cleaning guide covers everything you need to know to keep your nail nippers performing well for years.
Why Nail Nipper Maintenance Matters
Many practitioners underestimate how quickly a high-quality nipper can deteriorate without proper upkeep. Stainless steel is durable, but it is not indestructible. Exposure to moisture, harsh chemicals, and repeated use without lubrication will slowly wear down even the best instruments. A dull or stiff nipper not only performs poorly but also exerts greater pressure on the nail, increasing the patient's discomfort.
Properly maintaining your nippers also protects your investment. A well-made pair of professional nippers can cost a significant amount, and with the right care, they should last many years. Neglect them, and you could be replacing them far sooner than you should.
Cleaning Your Nail Nippers the Right Way
Properly cleaning nail nippers is essential for maintaining hygiene, preserving blade sharpness, and extending the instrument's lifespan. Following a consistent cleaning and maintenance routine helps protect against rust, corrosion, and the accumulation of harmful contaminants that can affect performance and safety.
Clean After Every Single Use
This is the most important step in any nail nipper cleaning guide. After each use, debris, nail fragments, and moisture collect around the blade and joint. If left, they dry and harden, making them more difficult to remove and more likely to lead to corrosion. A soft brush or cloth may be used to sweep away brush debris immediately after use.
Use the Right Cleaning Products
Avoid using harsh chemicals like bleach or powerful cleaning agents, disinfectants that are not formulated for metal instruments. These can strip the protective layer from stainless steel, leaving it vulnerable to rust. Use an enzyme-based cleaner or a product specifically designed for surgical-grade instruments. Always rinse thoroughly and ensure the item is completely dry before storage.
Dry Thoroughly Before Putting Them Away
Moisture is one of the biggest enemies of metal tools. Even a small amount of water sitting in the joint or around the blade can start the rusting process. After cleaning, ensure all surfaces are completely dry with a clean cloth, lint-free cloth, and allow the nipper to air-dry fully before placing it in storage or a case.
Disinfection for Clinical Use
If you use nail nippers in a clinical or podiatry setting, disinfection after cleaning is essential. Use an approved disinfectant solution that is safe for stainless steel instruments. Always follow the product's contact time guidelines. Do not rush this step; proper disinfection takes time to work effectively.
Autoclave Carefully
If your nippers are autoclave-safe, follow the manufacturer's instructions for cycle temperature and duration. Not all nippers tolerate repeated autoclaving, and using incorrect settings can weaken the metal or affect the blade alignment. Check the instrument's specifications before adding it to a sterilisation cycle.
MediTools Pty Ltd stocks a comprehensive range of podiatry and nail care instruments, trusted by healthcare professionals across Australia. Browse the full range of medical instruments in Australia and find the right tools for your practice!
Lubrication and Joint Care
Proper lubrication is equally important as regular cleaning when it comes to maintaining nail nippers. Regular joint care reduces friction between moving parts, helps prevent premature wear, and ensures the instrument continues to function smoothly and precisely over time.
Why Lubrication Is Non-Negotiable
The joint of a nail nipper is its most vulnerable part. It bears the pressure of every cut, and without lubrication, the metal parts rub together and wear down. Over time, this causes stiffness, looseness, or misalignment. A small drop of lubricant after each cleaning session keeps the joint moving smoothly and protects it from internal corrosion.
Choosing the Right Lubricant
For nippers used in clinical settings, use a water-based instrument lubricant rather than an oil-based product. Oil-based lubricants can leave residue that interferes with sterilisation. Apply just one drop directly to the joint and work it in by opening and closing the nipper several times. That is all it takes.
Storage Tips That Most People Overlook
Poor storage is responsible for much of the preventable damage to nail nippers. Here are the key nail nipper care tips to follow when it comes to storing your tools:
● Always store nippers in a dry environment. Humidity above 60% accelerates corrosion.
● Use a protective case or pouch to prevent the blades from contacting other tools or surfaces.
● Never toss nippers loosely into a drawer or instrument tray where they can knock against harder objects.
● Keep them away from direct sunlight and heat, which may compromise the steel's temper.
● Store them in the closed position to protect the cutting edge.
Signs Your Nail Nippers Need Attention
Even with regular maintenance, nippers will eventually show wear. Knowing when to act prevents you from using a tool that delivers poor results or risks patient comfort.
Stiffness in the joint is often the first sign of dryness or early corrosion. Lubrication may fix this, but if it persists, inspect the joint more closely for damage.
Misaligned blades mean the cutting edges are no longer meeting properly, resulting in uneven cuts and increased pressure. This usually requires professional resharpening or replacement.
Visible rust spots, even small ones, should be addressed immediately. Surface rust can sometimes be removed, but deeper pitting typically means the instrument needs to be replaced.
A loose or wobbly joint signals that the pivot mechanism has worn down, often from improper storage, internal rust, or incorrect self-adjustment.
How to Get the Most Out of Your Professional Nail Nippers?
Investing in professional nail nippers made from high-grade stainless steel is the first step. Quality instruments hold their edge longer, resist corrosion better, and tolerate repeated sterilisation without losing their precision. The habits described in this blog are what separate tools that last one year from tools that last ten.
Training every person who uses the nippers is just as important as the maintenance routine itself. When everyone in the team knows how to clean, lubricate, store, and inspect properly, the results are consistent, and the instruments last longer.
Final Thoughts
Nail nippers are precision instruments, and they deserve to be treated that way. Cleaning them after every use, lubricating the joint regularly, storing them correctly, and watching for early signs of wear are all simple habits that make a real difference. You do not need to spend hours on maintenance; you just need to be consistent.
When every step of care is followed properly, your nippers stay sharp, your cuts stay clean, and your patients stay comfortable. That is a result worth working for.
MediTools Pty Ltd offers a trusted range of medical and surgical instruments for clinical use with long-term durability. Let us help you find the right instruments for your practice today!
Disclaimer
The content provided here on the sterilization, cleaning, and reprocessing of surgical and medical instruments is strictly for informational and educational purposes only. This information is not a substitute for professional training, certification, or the manufacturer's official Instructions for Use (IFU). Sterilization is a critical, complex process that demands strict adherence to regulatory standards; improper technique can cause serious harm, including patient infection. All healthcare personnel must follow their facility's established protocols and the specific IFU for every instrument and piece of equipment. By using this blog, you agree that the author/owner holds no liability for any damages or consequences resulting from the application or misuse of this information.